Quick Pan-Seared Chicken Breast: Juicy & Done in 30 Minutes
In a world craving quick, healthy, and utterly delicious meals, the humble pan seared chicken breast emerges as a true weeknight champion. Forget dry, flavorless chicken; with a few simple techniques, you can achieve a remarkably juicy interior with a beautifully browned, savory crust in under 30 minutes. This guide will unlock the secrets to perfect pan-seared chicken, transforming your dinner routine from mundane to magnificent.
Whether you're a seasoned home cook or just starting your culinary journey, mastering the art of the pan-seared chicken breast is an invaluable skill. It's not just about speed; it's about maximizing flavor and texture with minimal fuss. Get ready to impress yourself and your family with chicken that's moist, tender, and packed with flavor, ready to be the star of any meal.
Mastering the Cold-Start Pan Sear: Your Path to Perfection
The core secret to achieving an incredibly juicy and evenly cooked pan seared chicken breast lies in a technique often favored by professional chefs: the "cold-start" sear. This method, contrary to traditional searing, involves placing the chicken in a cold pan and then bringing it up to temperature. The gradual heating allows the chicken to cook more gently from the outside in, rendering fat slowly, preventing sticking, and building an unparalleled crust without overcooking the interior.
Essential Equipment and Ingredients
Before you even touch a chicken breast, ensure you have the right tools and quality ingredients:
- Skillet: A good quality 12-inch nonstick or carbon-steel skillet is ideal. Cast iron can also work wonders, providing excellent heat retention for that coveted crust.
- Meat Pounder: Essential for achieving even thickness, which is crucial for uniform cooking. If you don't have one, a heavy-bottomed pan or rolling pin covered in plastic wrap will do.
- Chicken Breasts: Opt for boneless, skinless chicken breasts, preferably similar in size (up to 10 ounces each is ideal). Larger breasts (10-12 ounces) can still be used but might require slicing for even cooking, and anything over 12 ounces is generally not recommended for this method as the exterior can toughen before the center cooks through.
- Oil: A neutral, high-smoke-point oil like vegetable, canola, or grapeseed oil is perfect. Approximately 2 tablespoons will be enough.
- Kosher Salt: Approximately 2 teaspoons. Adjust based on the type of kosher salt you use (e.g., Diamond Crystal vs. Morton). Freshly ground black pepper is also highly recommended.
Prepping Your Chicken for Success
Preparation is key to a flawless pan seared chicken breast:
- Trim and Pound: Carefully trim any visible fat from the chicken breasts. Then, place each breast between two sheets of plastic wrap. Using a meat pounder, gently pound the thicker end of each breast until it's a uniform ½ inch thick. This ensures even cooking throughout.
- Pat Dry, Thoroughly: This step cannot be overstated. Moisture on the surface of the chicken will steam rather than sear, preventing that beautiful brown crust. Use paper towels to pat both sides of each breast absolutely dry.
- Season Liberally: Lightly brush both sides of each breast with your chosen oil. Then, evenly sprinkle each breast with about ½ teaspoon of kosher salt and a generous grind of black pepper. For added flavor, consider a pinch of garlic powder, onion powder, or paprika.
The Cold-Start Searing Process
Now, for the magic of the cold-start:
- Place in Cold Pan: Arrange the seasoned chicken breasts in your unheated, dry 12-inch skillet. Ensure they are in a single layer and not overcrowded. If you're cooking more than 3-4 breasts, sear them in batches. Overcrowding can lower the pan temperature and lead to steaming.
- High Heat, Initial Sear: Place the skillet over high heat and cook for 2 minutes. You should start to hear sizzling and see some light browning when you lift an edge.
- Flip and Continue Browning: Flip the breasts and cook for another 2 minutes. You're aiming for light browning at this stage.
- Reduce Heat, Frequent Flipping: Flip the breasts again, then reduce the heat to medium. Continue to cook, flipping the breasts every 2 minutes. This frequent flipping encourages the exterior to slowly develop a deep, rich brown crust while ensuring the interior cooks gently and evenly.
- Check for Doneness: Continue cooking and flipping until the exterior is well browned and crispy. The thickest part of the breast should register an internal temperature of 155°F when checked with an instant-read thermometer. This typically takes 6 to 8 minutes longer after reducing the heat, but may vary based on breast thickness.
The Critical Rest Period
Once your chicken reaches 155°F, transfer the breasts (skinned side up) to a platter and immediately tent them loosely with foil. Let them rest for at least 10 minutes. This resting period is crucial! It allows the juices, which have migrated to the center during cooking, to redistribute throughout the meat, resulting in an incredibly tender and juicy chicken breast. The internal temperature will also climb to a safe 165°F during this time. For more insights on this technique, check out our guide on Cold-Start Pan Seared Chicken: The Secret to Juicy Breasts.
Elevate Your Pan-Seared Chicken: Flavor Variations & Serving Ideas
A perfectly cooked pan seared chicken breast is delicious on its own, but it also serves as an excellent canvas for countless flavor combinations and meal pairings.
Quick Pan Sauces to Impress
The beauty of pan-searing is the flavorful fond (the browned bits) left in the pan. Don't let it go to waste! While your chicken rests, whip up a quick pan sauce:
- Garlic Mushroom Jus: Return the skillet to medium heat. Add a knob of butter and sauté sliced mushrooms until tender. Add minced garlic, a splash of red wine (or chicken broth), and a squeeze of fresh lemon juice. Simmer for a few minutes until slightly reduced, scraping up all the flavorful bits from the bottom of the pan. This makes a rich, savory jus perfect for drizzling over the chicken.
- Lemon-Herb Butter Sauce: After removing the chicken, melt 2 tablespoons of butter in the skillet. Add a minced shallot (or garlic), a squeeze of lemon juice, and a tablespoon of fresh chopped herbs like parsley, chives, or thyme. Swirl to combine and serve immediately.
- Simple Tomato-Basil: Sauté some chopped garlic, then add a can of crushed tomatoes, a pinch of red pepper flakes, and fresh basil. Simmer until slightly thickened for a rustic, flavorful sauce.
Perfect Pairings and Presentation
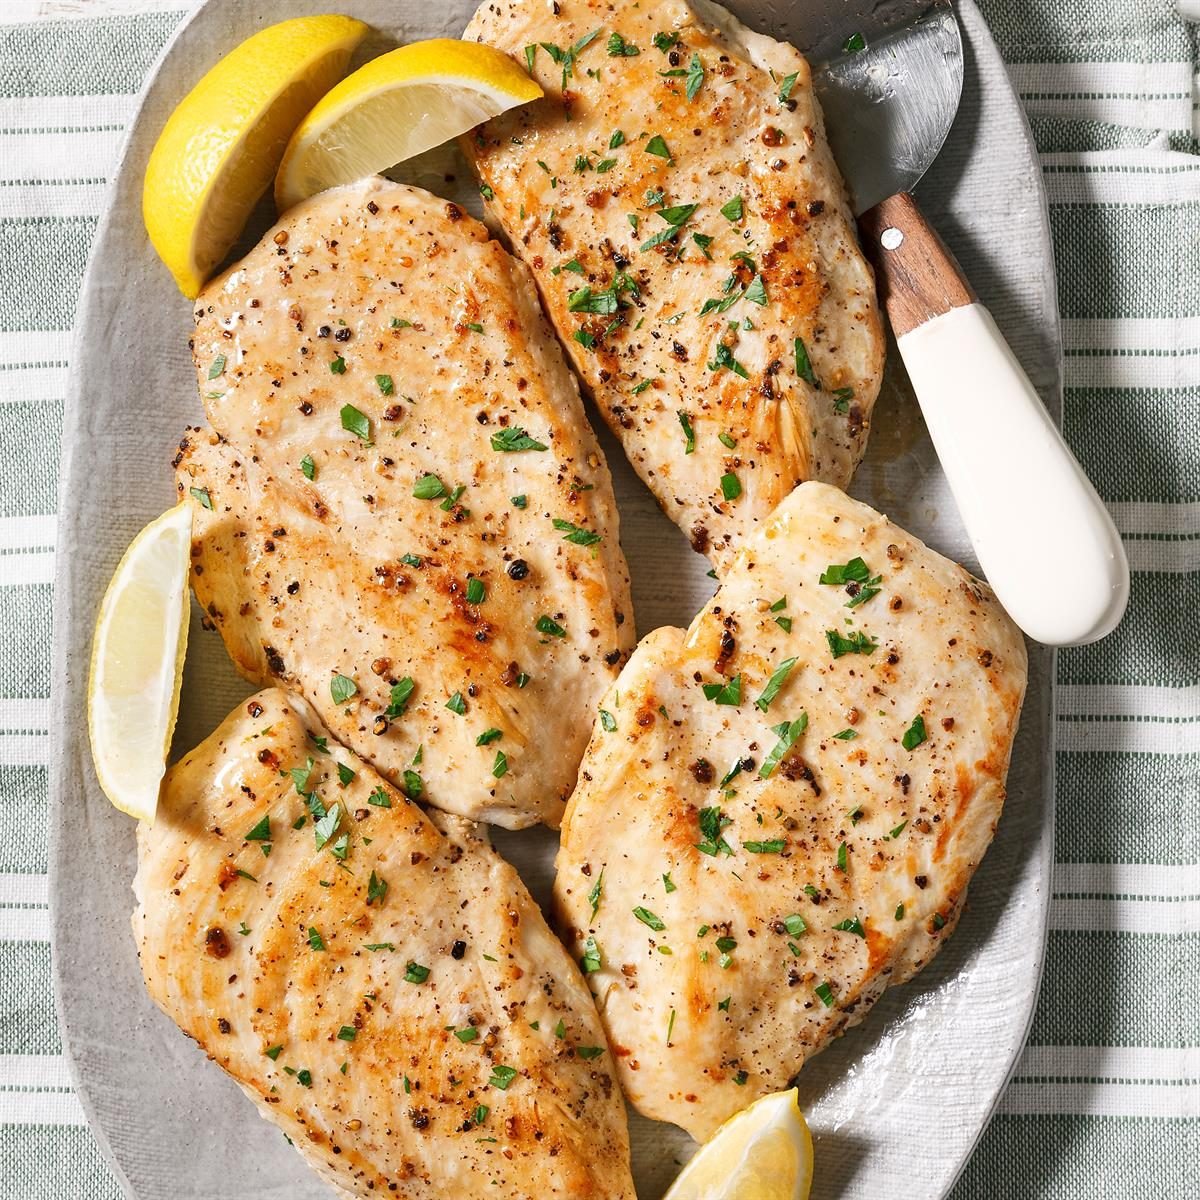
To serve, slice the rested chicken breasts crosswise into ½-inch thick pieces and fan them out artfully on plates. Your perfectly pan seared chicken breast pairs wonderfully with:
- Roasted or Sautéed Vegetables: Asparagus, green beans, broccoli, or bell peppers make vibrant and healthy companions.
- Creamy Mashed Potatoes or Rice: Ideal for soaking up any delicious pan sauce.
- Fresh Salads: A light green salad with a vinaigrette provides a refreshing contrast.
- Pasta Dishes: Slice the chicken and toss it with your favorite pasta and a light sauce.
Common Mistakes to Avoid for a Flawless Pan-Seared Chicken Breast
Even with the best instructions, common pitfalls can derail your quest for the perfect pan seared chicken breast. Steer clear of these:
- Overcrowding the Pan: This is a major culprit for steamy, not seared, chicken. If your pan is too full, the temperature drops, and moisture has nowhere to escape, preventing a crust from forming. Cook in batches if necessary.
- Not Pounding Evenly: Uneven thickness leads to uneven cooking. You'll end up with dry edges and an undercooked center.
- Skipping the Drying Step: Excess moisture is the enemy of a good sear. Always pat your chicken thoroughly dry with paper towels.
- Not Resting the Chicken: Impatience will cost you juiciness. Resting allows the internal temperature to equalize and the juices to redistribute, ensuring every bite is tender.
- Using Too Low or Too High Heat Consistently: The cold-start method with initial high heat and then reduced to medium is intentional. Too low heat won't brown, too high heat will burn the exterior before the interior cooks.
For more detailed tips on achieving that ideal crispy exterior and juicy interior, explore our article: Secrets to Perfectly Pan-Seared Chicken: Juicy & Crispy.
Your Quick, Juicy Pan-Seared Chicken Awaits!
With the cold-start searing technique and these detailed tips, preparing a quick, juicy, and perfectly browned pan seared chicken breast is no longer a culinary challenge, but a triumph. This method guarantees a tender, moist interior and an irresistible crispy crust, all ready in 30 minutes. It's an incredibly versatile dish that can be adapted to countless flavors and meals, making it an essential arrow in your weeknight cooking quiver. So, grab your skillet, follow these steps, and prepare to enjoy the best pan-seared chicken you've ever made!
